In this article we look at a very simple method for creating a sky. It does not require a lot of time and much effort, but it has some disadvantages, which we will try to minimize by using some tricks. We hope that you have already learned how to create "closed" maps, without the sky, representing one or more interconnected rooms.
Visually, the sky in Half-Life can be represented as frying pans with transparent lid, where the frying pan is your level, and the transparent lid is the sky. The lid should fit tightly to the edges of the frying pan, there should be no cracks or holes leading to the "outside world". This is a mandatory and very important condition when creating the sky. The sky must completely separate the map from the outside world, otherwise a compilation error will occur (the notorious LEAK error).
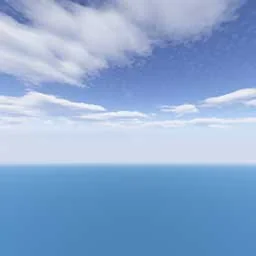
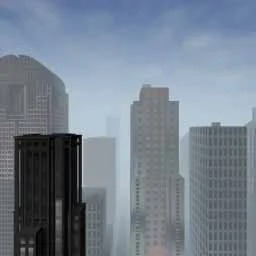
Why is the lid transparent? The fact is that the sky itself, i.e. SKY brushes are transparent for the game. In fact, the player sees a PICTURE, or more precisely 6 sky pictures, superimposed (projected) onto the sides of an imaginary cube. This cube is located outside the map (outside the frying pan with a transparent lid :). Imagine a large cube behind a map with pictures of the sky superimposed on its sides. The player looks through the transparent lid of the frying pan and sees these pictures. The pictures were created in a special program and adjusted to each other in such a way that the player gets the impression that he is seeing an ordinary "round" sky, and not pictures superimposed on a cube.
Only texture is used to create the sky SKY. There should be no other textures on the sky brushes except SKY. This is another mandatory condition.
In this article we will build a simple sky - one large box around the card. We will simply place our entire map in a huge room, painted on all sides with texture SKY.
Well then. Suppose we have such a small open map, very simple in design (see figure below).
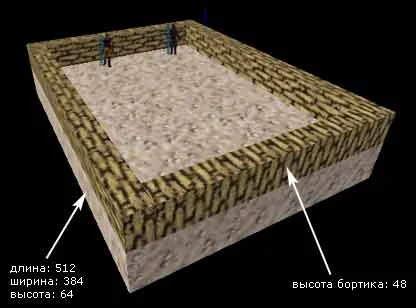
As you can easily calculate, the map consists of only 5 brushes (1 brush for the ground and 4 brushes for the sides). Just in case, we report the dimensions of the map: the ground has dimensions of 512x384x64 units, and 4 sides are 48 units high.
Select texture SKY (it is in the standard and largest texture library halflife.wad) and build a large brush around the map so that the map is completely in it, and there is still some space left around the edges (preferably 16-32 units on each side).
The pictures below show the top and front views and the outlines of the SKY brush being created. In principle there is no need to leave so much empty space to the edges of the card. This is even harmful and will slow down compilation. It's better, of course, to build SKY-brushes close to the walls of the map, but for now let it be so - with a margin.
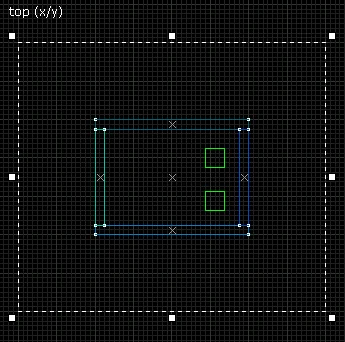
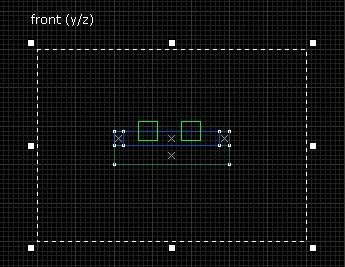 After we finish creating the SKY brush, by pressing "Enter", we need to turn it into a ROOM. We discussed this operation in detail in the article.
Creating Hollow Objects with Hollow.
After we finish creating the SKY brush, by pressing "Enter", we need to turn it into a ROOM. We discussed this operation in detail in the article.
Creating Hollow Objects with Hollow.
That is, we had one SKY brush, and after using the function Hollow, a room appeared consisting of 6 SKY brushes (floor, ceiling, walls). Creating a room of 6 SKY brushes is necessary for the sky to work. Now our map is inside a room consisting of 6 walls, completely painted with texture SKY.
How to apply Hollow: select the SKY brush and click [Ctrl-H], that is, we use the Hollow function - we add thickness to the walls of the brush. In the window that appears, you need to indicate the thickness of the walls of the room. You can leave the default value: 32.
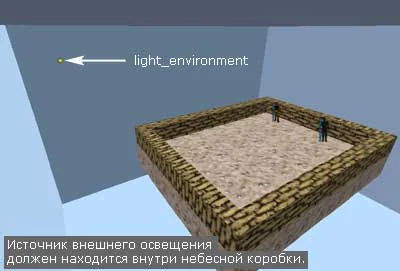
Simple sky is ready! After this operation, the map should look something like this:
It should be noted that the operation of calculating lighting is the longest of all and also the most demanding of computer resources. Therefore, it is imperative to PAINT ALL OUTSIDE SIDES of the card SKY texture. But in this case, naturally, not to create the sky, but simply so that the compiler HLRAD I did not calculate the lighting for these surfaces. SKY texture is simply ignored by this compiler! It would be a sin not to take advantage of this wonderful property and not significantly speed up the map compilation process.
The pictures below show the unpainted and shaded outer sides of the card (this card also has a shaded bottom), which the player will never see in the game. These surfaces will not be calculated for lighting, thereby compiling time will be significantly reduced (the larger the map, the greater the savings, sometimes up to 50% of time is saved!). You can also paint over the roofs of houses and any other surfaces that the player will NEVER SEE in the game. By the way, thanks to this, the size of the card (in MB) is also reduced.
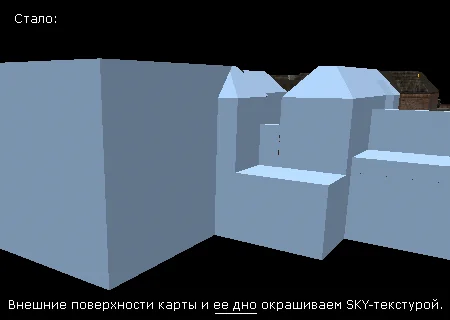
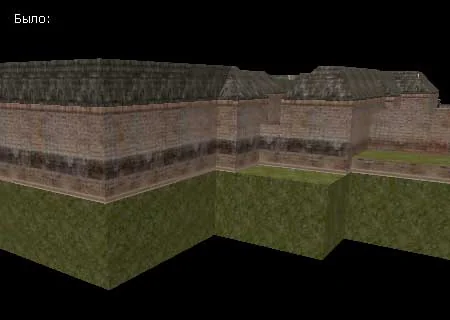
You can also paint over house roofs and other similar surfaces that are invisible to the player with the SKY texture.
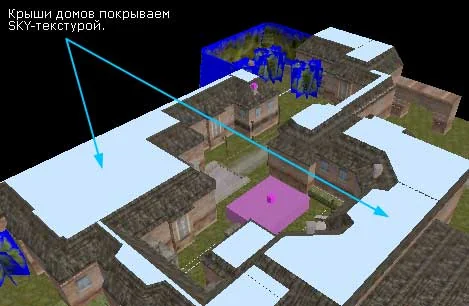
That's all about optimizing the map for a simple sky box. If these simple two measures are not followed, then with a large map, the compilation time can become very long. Agree, there is a difference in how long you wait: 1.5 hours or 40 minutes.
Pictures with images of the sky are in the directory "cstrike\gfx\env.."and have the format TGA 24-bit and sizes 256x256 pixels. It is also possible to use images in the formats PCX And BMP 8-bit, but they are only needed for playing on old, old video maps without a 3D accelerator. All modern video maps have an accelerator, so there is no need to use BMP and PCX formats.
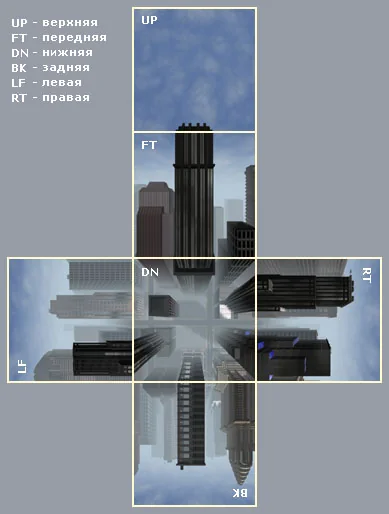
Since the pictures are superimposed on the sides of the cube, there are 6 pictures of the sky in total. The names of the pictures have the following format:
skynameRT.tga - right picture (from English. right)
skynameFT.tga - front picture (from English. front)
skynameLF.tga - left picture (from English. left)
skynameBK.tga - back picture (from English. back)
skynameUP.tga - top picture (from English. up)
skynameDN.tga - bottom picture (from English. down)
Where skyname is any combination of letters and numbers indicating the name of the sky.
Each of these pictures is "drawn" in a special program (there are several of them) in a rather cunning way :) - if you put them next to each other, they form a closed space (a single landscape). It should be noted that the appearance of these pictures in the game does not depend in any way on the shape of the sky (SKY brushes). It's just that where the player sees SKY brushes, he sees the sky (pictures projected onto a distant imaginary cube).
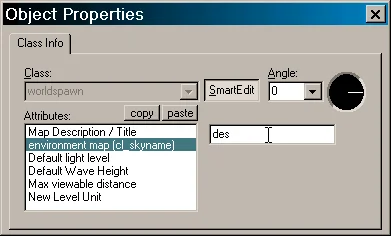
In the editor, open the window with general properties of the map "Map\Map properties..." And enter the name of the sky in the parameter environment map (see picture below). WITHOUT THE LAST TWO LETTERS!
Below we have written the name des - this is the sky from DE_DUST.
 And this is what our map will look like in the game:
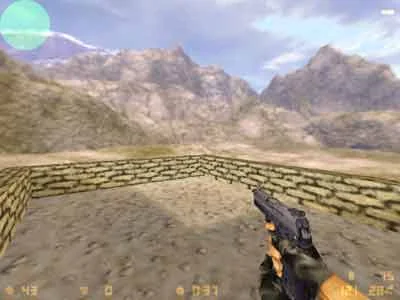
Now all that remains is to place the light source light_environment inside the card, i.e. under a hood of SKY brushes and start compilation.
[–] the HLVIS compiler takes longer to optimize the visual part of the map due to the calculation of extra clipnode planes outside the map;
[–] compilation time increases due to miscalculation of lighting of external (invisible in the game) surfaces of objects;
[–] larger size of the finished map
[+] You will never encounter the dreaded :) LEAK error
[+] Provided that two steps are followed to optimize the map with a sky-box, most of the shortcomings disappear
As you can see, there are several advantages and quite significant ones, however, if you do not optimize the map, then the 4 disadvantages will turn out to be much more significant. In principle, it can be argued that sky box - this is bad, but for simple and small maps it is quite acceptable. On large maps, we recommend creating a more complex, but also more correct sky. Creating the right sky will be discussed in the next article of the Tutorial.
sky_simple.zip [9Kb] - in the archive there is an example map in BSP and RMF formats.
What is heaven?
The sky in Half-Life (CS) is a simulation of open space, which is implemented as follows:- SKY brushes built around the map
- A picture of the sky recorded in the map properties
Visually, the sky in Half-Life can be represented as frying pans with transparent lid, where the frying pan is your level, and the transparent lid is the sky. The lid should fit tightly to the edges of the frying pan, there should be no cracks or holes leading to the "outside world". This is a mandatory and very important condition when creating the sky. The sky must completely separate the map from the outside world, otherwise a compilation error will occur (the notorious LEAK error).
Why is the lid transparent? The fact is that the sky itself, i.e. SKY brushes are transparent for the game. In fact, the player sees a PICTURE, or more precisely 6 sky pictures, superimposed (projected) onto the sides of an imaginary cube. This cube is located outside the map (outside the frying pan with a transparent lid :). Imagine a large cube behind a map with pictures of the sky superimposed on its sides. The player looks through the transparent lid of the frying pan and sees these pictures. The pictures were created in a special program and adjusted to each other in such a way that the player gets the impression that he is seeing an ordinary "round" sky, and not pictures superimposed on a cube.
Only texture is used to create the sky SKY. There should be no other textures on the sky brushes except SKY. This is another mandatory condition.
In this article we will build a simple sky - one large box around the card. We will simply place our entire map in a huge room, painted on all sides with texture SKY.
Well then. Suppose we have such a small open map, very simple in design (see figure below).
As you can easily calculate, the map consists of only 5 brushes (1 brush for the ground and 4 brushes for the sides). Just in case, we report the dimensions of the map: the ground has dimensions of 512x384x64 units, and 4 sides are 48 units high.
Select texture SKY (it is in the standard and largest texture library halflife.wad) and build a large brush around the map so that the map is completely in it, and there is still some space left around the edges (preferably 16-32 units on each side).
The pictures below show the top and front views and the outlines of the SKY brush being created. In principle there is no need to leave so much empty space to the edges of the card. This is even harmful and will slow down compilation. It's better, of course, to build SKY-brushes close to the walls of the map, but for now let it be so - with a margin.
After we finish creating the SKY brush, by pressing "Enter", we need to turn it into a ROOM. We discussed this operation in detail in the article.
Creating Hollow Objects with Hollow.That is, we had one SKY brush, and after using the function Hollow, a room appeared consisting of 6 SKY brushes (floor, ceiling, walls). Creating a room of 6 SKY brushes is necessary for the sky to work. Now our map is inside a room consisting of 6 walls, completely painted with texture SKY.
How to apply Hollow: select the SKY brush and click [Ctrl-H], that is, we use the Hollow function - we add thickness to the walls of the brush. In the window that appears, you need to indicate the thickness of the walls of the room. You can leave the default value: 32.
Simple sky is ready! After this operation, the map should look something like this:
Reducing harm from box sky (method No. 1)
Most likely, you will have some space between the walls of the room and the map (as in our picture). It is advisable to make the room exactly the size of the map, so that there is no space left either near the bottom or near the walls of the map. That is, you need the walls of the room to be in contact with the walls and bottom of the map. But on the contrary, there needs to be some space on top of the map so that players don't hit their heads against the sky and can jump freely. This advice will help reduce the work of compilers, which will not need to calculate the empty space around the map.Reducing harm from box sky (method No. 2)
When you have created a tight-fitting room of SKY brushes around the map, you need to reduce the work of the compiler HLRAD, which calculates the lighting on the map. The fact is that the lighting on the map is projected precisely from SKY textures. Compiler HLRAD determines where SKY brushes are located and projects lighting from them onto all other objects that have any texture. That is, it will calculate both the bottom and the outer sides of the map, because they have textures and come into contact with SKY brushes, "seeing" the sky.It should be noted that the operation of calculating lighting is the longest of all and also the most demanding of computer resources. Therefore, it is imperative to PAINT ALL OUTSIDE SIDES of the card SKY texture. But in this case, naturally, not to create the sky, but simply so that the compiler HLRAD I did not calculate the lighting for these surfaces. SKY texture is simply ignored by this compiler! It would be a sin not to take advantage of this wonderful property and not significantly speed up the map compilation process.
The pictures below show the unpainted and shaded outer sides of the card (this card also has a shaded bottom), which the player will never see in the game. These surfaces will not be calculated for lighting, thereby compiling time will be significantly reduced (the larger the map, the greater the savings, sometimes up to 50% of time is saved!). You can also paint over the roofs of houses and any other surfaces that the player will NEVER SEE in the game. By the way, thanks to this, the size of the card (in MB) is also reduced.
You can also paint over house roofs and other similar surfaces that are invisible to the player with the SKY texture.
That's all about optimizing the map for a simple sky box. If these simple two measures are not followed, then with a large map, the compilation time can become very long. Agree, there is a difference in how long you wait: 1.5 hours or 40 minutes.
Selecting a picture of the sky
As mentioned above, the sky itself is transparent, and the player sees 6 pictures of the sky projected onto an imaginary cube.Pictures with images of the sky are in the directory "cstrike\gfx\env.."and have the format TGA 24-bit and sizes 256x256 pixels. It is also possible to use images in the formats PCX And BMP 8-bit, but they are only needed for playing on old, old video maps without a 3D accelerator. All modern video maps have an accelerator, so there is no need to use BMP and PCX formats.
Since the pictures are superimposed on the sides of the cube, there are 6 pictures of the sky in total. The names of the pictures have the following format:
skynameRT.tga - right picture (from English. right)
skynameFT.tga - front picture (from English. front)
skynameLF.tga - left picture (from English. left)
skynameBK.tga - back picture (from English. back)
skynameUP.tga - top picture (from English. up)
skynameDN.tga - bottom picture (from English. down)
Where skyname is any combination of letters and numbers indicating the name of the sky.
Each of these pictures is "drawn" in a special program (there are several of them) in a rather cunning way :) - if you put them next to each other, they form a closed space (a single landscape). It should be noted that the appearance of these pictures in the game does not depend in any way on the shape of the sky (SKY brushes). It's just that where the player sees SKY brushes, he sees the sky (pictures projected onto a distant imaginary cube).
Specify the name of the sky
So, choose your favorite sky picture and remember its name. Drop it 2 LAST LETTERS (RT, FT, LF, BK, UP, DN).In the editor, open the window with general properties of the map "Map\Map properties..." And enter the name of the sky in the parameter environment map (see picture below). WITHOUT THE LAST TWO LETTERS!
Below we have written the name des - this is the sky from DE_DUST.
And this is what our map will look like in the game:
Recommendations for choosing a sky picture
Try to match the sky to the architecture and color of the main map textures. For example, if the map is light and there are mountains on it, then you should choose a picture with mountains and a light sky. If the action on the map takes place at night, in the city, then the sky in the picture should be night, etc.Now all that remains is to place the light source light_environment inside the card, i.e. under a hood of SKY brushes and start compilation.
Disadvantages of the sky-box:
[–] you can fall outside the map if you do not additionally use CLIP brushes that limit movement, or if the sky is not close to the map;[–] the HLVIS compiler takes longer to optimize the visual part of the map due to the calculation of extra clipnode planes outside the map;
[–] compilation time increases due to miscalculation of lighting of external (invisible in the game) surfaces of objects;
[–] larger size of the finished map
Advantages of the sky-box:
[+] fast production[+] You will never encounter the dreaded :) LEAK error
[+] Provided that two steps are followed to optimize the map with a sky-box, most of the shortcomings disappear
As you can see, there are several advantages and quite significant ones, however, if you do not optimize the map, then the 4 disadvantages will turn out to be much more significant. In principle, it can be argued that sky box - this is bad, but for simple and small maps it is quite acceptable. On large maps, we recommend creating a more complex, but also more correct sky. Creating the right sky will be discussed in the next article of the Tutorial.
sky_simple.zip [9Kb] - in the archive there is an example map in BSP and RMF formats.
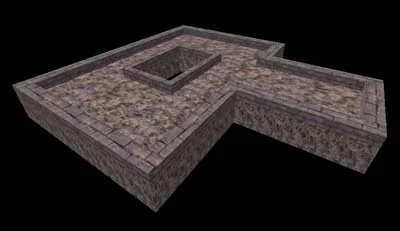
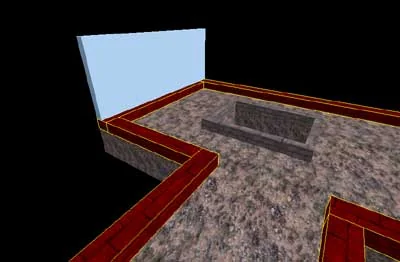
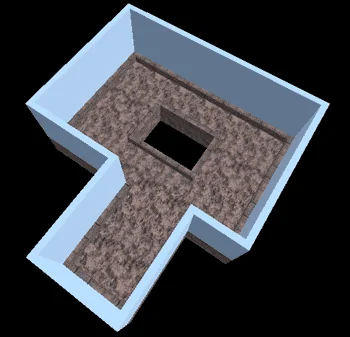 Please note that the hole in the center of the card also needs to be closed with a SKY brush from the BOTTOM (see figure below), which exactly matches the hole in length and width. We remember that the sky must completely protect the map from the "external vacuum". Remember our conversations about the frying pan lid fitting tightly to the edges in the last article :) There should be no holes or cracks, otherwise an error will occur
LEAK.
Please note that the hole in the center of the card also needs to be closed with a SKY brush from the BOTTOM (see figure below), which exactly matches the hole in length and width. We remember that the sky must completely protect the map from the "external vacuum". Remember our conversations about the frying pan lid fitting tightly to the edges in the last article :) There should be no holes or cracks, otherwise an error will occur
LEAK.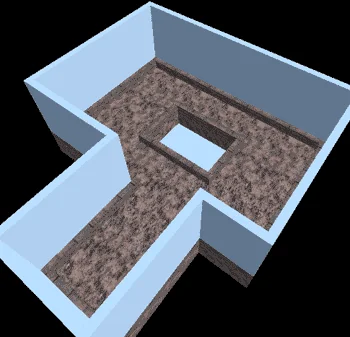 The hole in the center was closed. Now you need to close the top of the card. We do this using two fairly large SKY brushes (see figure below).
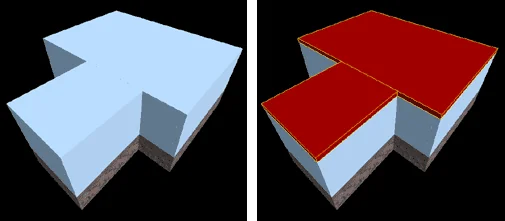 We could stop here, because... the sky itself is already complete, but let's also limit the player's movement so that he can't fall into the central hole. To do this, we will build in place of the hole CLIP brush, i.e. regular brush, painted on all sides with special paint. texture
CLIP. Such brushes are invisible in the game, but the player cannot pass through them and, accordingly, cannot fall into the hole (see figure below).
We could stop here, because... the sky itself is already complete, but let's also limit the player's movement so that he can't fall into the central hole. To do this, we will build in place of the hole CLIP brush, i.e. regular brush, painted on all sides with special paint. texture
CLIP. Such brushes are invisible in the game, but the player cannot pass through them and, accordingly, cannot fall into the hole (see figure below).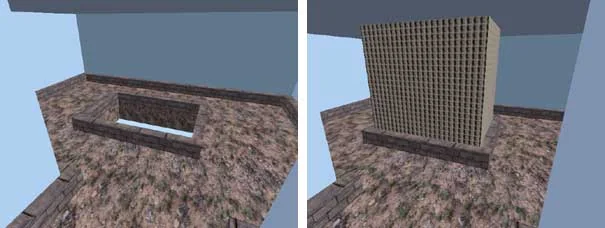
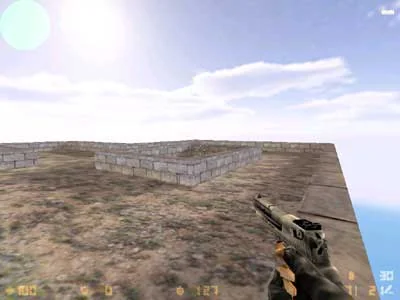
 Let us briefly explain what these parameters mean.
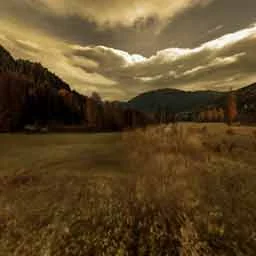
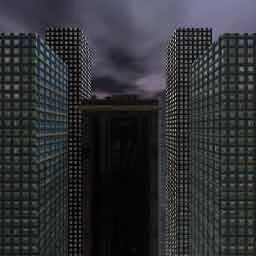
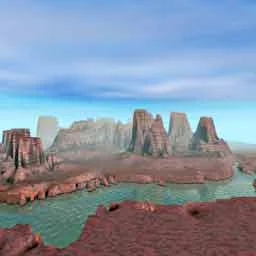
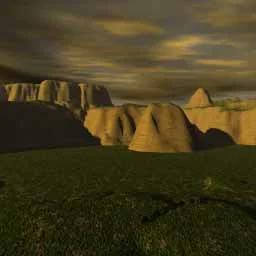
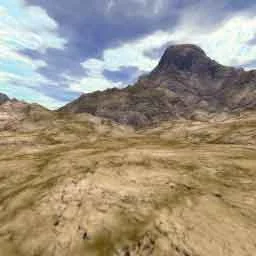
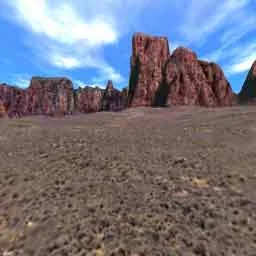
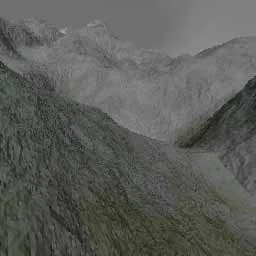
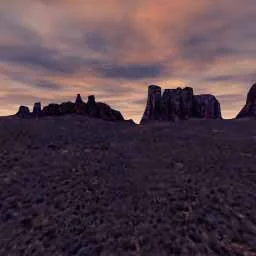
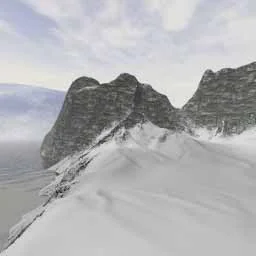
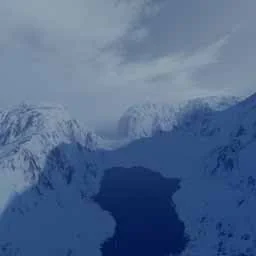
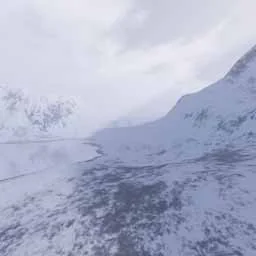
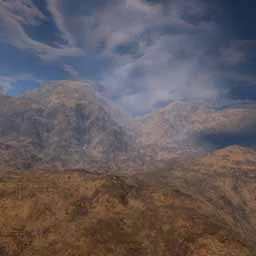
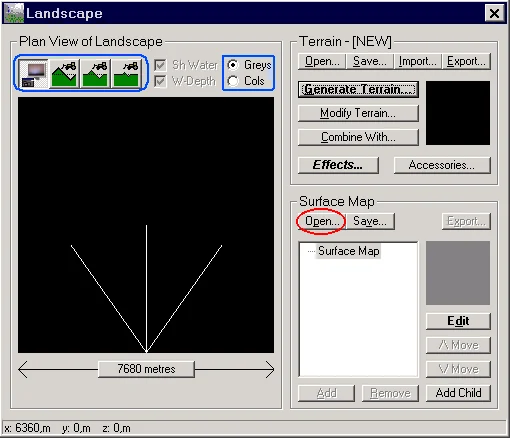 First, let's open one of the standard appearances (the Open button in the figure above). We have a small choice, only 5 different surfaces, among which are: "Desert with grass", "Grass and sand", "Grass and snow", "Lifeless desert" and "Red desert".
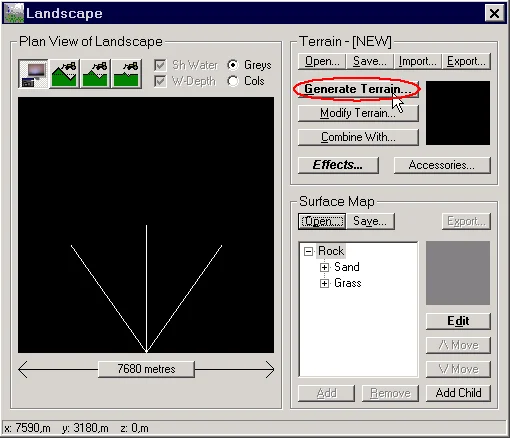 After clicking on Generate Terrain..., the following window will appear in which you can set the parameters of the future surface (highlighted in blue).
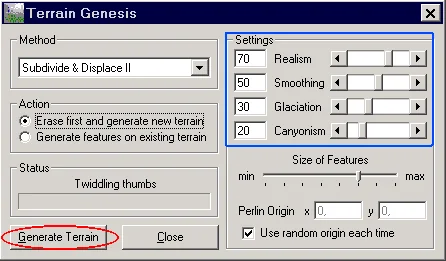 Method
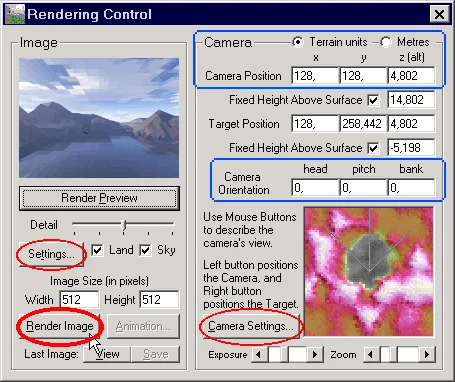 What is not highlighted with a blue rectangle (Target Position) sets the target coordinates for the camera, i.e. the points where she looks. In principle, you can not indicate these coordinates.
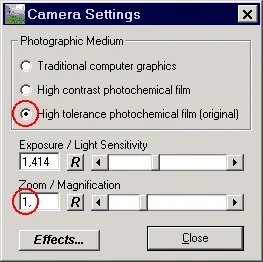 Photographic Medium
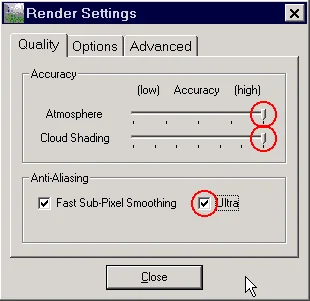 Let's return to the picture with the Rendering Control window (see figure below).