From this article you will learn what textures and decals are, what textures are called in Half-Life, you will learn about standard texture files, as well as what size and scale is best to use textures on your maps.
Texture is a picture, a graphic image that is applied to the sides of objects. Thanks to textures, we distinguish a sandy path from an asphalt one, a wooden box from a block of stone, a brick wall from a rock, etc. Of course, simply repainting an object, for example, with the texture of a car, will not make it drive, just as a regular brush painted with the texture of a door will not open - to do this, you need to turn the brush into an entity object and set properties for it.
Also, textures, oddly enough, affect penetration objects. In the folder "Cstrike\sound"there is such a file materials.txt, which lists the names of some standard textures and the material type assigned to them (wood, metal, rock, dirt, etc.). It was experimentally found that objects painted, for example, with a metal texture penetrate worse than objects with a wood or rock texture. However, if the texture name is not specified in materials.txt (and this is what happens when using non-original, custom textures), then the penetration of all objects on the map will be the same, regardless of the applied texture.
1.2 Where are textures stored?
All textures for Half-Life are stored in the folder Valve. Maps for CS use textures from folders Valve And Cstrike. To store textures in Half-Life, files with the extension *.WAD are used. One such WAD file can contain any number of textures from one to several thousand, and maybe millions (we haven't checked :)
1.3 How can you view textures?
To view textures you can use the program Wally (you can also create your own texture libraries in it, i.e. WAD files). Textures can also be viewed in the Hammer editor, in the built-in texture browser.
1.4 What are the standard texture files called?
The word "standard" refers to those textures that are located in the Half-Life and CS folder after installing these games. It's no secret that map creators often use their own (or taken from somewhere else) textures. So these textures are not standard.
It turns out that the textures are from the folder Valve do not change and move from version to version. And here are the texture files for CS maps, which are in the folder Cstrike, may be removed or changed by developers. In principle, this is correct - if some official CS map was excluded from the list, then there is nothing to keep its textures for. Now imagine that your map used textures from this excluded WAD file...
After removing the WAD file from the standard game distribution, your card will not work. When the game does not find the WAD file that is used on the card, the card does not start and the game crashes with an error. And when some WAD file simply does not have the necessary textures, the map starts, but instead of the missing textures, black and purple squares are displayed. There is only one way out of this - include textures directly in the map (in the BSP file itself). But this is a topic for a separate article.
Below we provide a list of WAD files that are unlikely to ever be removed from the game and are therefore safe to use. You can use textures from these files and not include them in the map (in the BSP file). This will also slightly reduce the size of the map. After all, everyone has standard textures and it is unnecessary to transfer them along with the map.
chateau.wad
cs_bdog.wad
cs_havana.wad
de_piranesi.wad
de_vegas.wad
itsitaly.wad
These are also standard texture files (since they are installed with the game), but there is no guarantee that at some point the maps, and along with them the textures, will not be removed from the CS distribution. That is why we recommend including textures from such WAD files as part of the BSP file of the map.
Remember, if you use textures from non-standard (your or any other) WAD files, then be sure to distribute them along with your map (in one archive). It's best to include textures from all custom files in the BSP map, but you can also create a separate WAD file.
Let's say you create a map and use textures from 10 non-standard texture files: 2 textures from the first, 2 from the second, 5 from the third, etc. So, for the map to start, all WAD files involved in creating the map will be needed. There is no point in distributing them all along with the map. We don't use all the textures from these files. So why increase the archive size? That is why it is necessary to create 1 WAD file and write down the textures used in it. And it's even easier and faster, we repeat, to include textures in the BSP file of the map.
1.5 Including textures in the BSP map file
Including textures in the map's BSP file means writing the textures directly into the map itself (without separate files). This eliminates the need to distribute separate WAD files along with the map.
Standard textures from the 4 WAD files listed above do not need to be included in the map. Everyone has these textures, and they are unlikely to ever be removed from the game. All other textures must be included in the map using special parameters during compilation. You can read more about how to do this in one of our next articles in this Chapter.
1.6 Texture sizes
The minimum texture size in Half-Life is 16x16 pixels. Less is not possible, more is possible. The maximum texture size typically used by mappers is - 512x512 pixels. We never saw more. We instruct you to check what will happen when using larger textures :) By the way, the length and width of the texture should be a multiple of 16, for example: 128x64, 256x192, 48x32, etc.
Usually, when applying texture, 1 texture pixel equate to 1 unit of object length. This is considered a normal scale, i.e. 1:1. For example, a texture with dimensions of 64x64 pixels should be applied to the side of an object with dimensions of 64x64 units or smaller (in this case, the texture is "adjusted" by the button Fit).
With a 1:1 blending scale, the textures look good. But if the texture is smaller than the size of the object, then in the game we will see some smearing, depending on the scale value. But sometimes, in order to save polygons, textures are specially applied with an increased scale of 2:1, 4:1, etc. You can read more about this in Chapter VI from the article about R_Speeds. There, this technique for dealing with "brakes" is described in some detail on the map.
If you pay attention to the sizes of textures in standard WAD files, then it becomes clear from them what size standard objects are: boxes, doors, walls. For example, very often there are textures of boxes with a size of 64x64 or 128x128 pixels, this indirectly indicates the sizes of standard boxes of 64x64x64 and 128x128x128 units. Of course, no one forbids using other sizes; it's just that boxes that are too small or too large (and any other objects in general) may seem unrealistic. The main thing here is to maintain the correct scale so that it doesn't turn out like on the maps from the series de_rats, although the idea is interesting :)
1.7 Texture scale
As we mentioned above, 1 texture pixel is equal to 1 unit of object length. This is a 1:1 texture mapping scale. If we apply a 128x128 pixel texture to a 64x64 unit box, then the scale will be 1:2 (or 0.5). If we stretch a small 32x32 pixel texture onto a 64x64 unit box, the scale will be increased 2:1.
The scale of textures is directly related to the number of polygons visible to the player when he moves around the map. The larger the texture scale, i.e. the more they are stretched, the fewer polygons the game engine processes, and the less the card slows down. In this regard, we recommend increasing the scale of textures in unimportant places (maybe mountains, ground, somewhere else).
Again, we recommend reading the article about R_Speeds from Chapter VI, it gives more specific recommendations for optimizing the map.
1.8 Texture names
Textures in Half-Life, namely in the main file of this game halflife.wad They are named for a reason. For example, the word "crate" or "crt" in the name of a texture means that the texture is for a box ("crate" in English is a box).
In addition to these words, there are certain prefixes (a set of 2-3 characters) that come immediately before the name of the texture, or rather make up the very first part of the name of the texture. These prefixes determine whether a texture belongs to a certain type. For example, a prefix in the form of an exclamation mark "!" means it is the texture of water; if at the beginning of the name there is a curly brace "{", then this is a partially transparent texture (i.e. a texture with a mask; used to create transparent fences, trees, etc.).
You can get the most detailed information about texture types from the next article in this Chapter.
Unfortunately, you can only use standard decals on your maps. Unlike textures, decals cannot be included in the map and you cannot use your own decals, so you have to be content with the standard ones from the decals.wad file, although they are not so bad.
1. Textures
1.1 What is texture?Texture is a picture, a graphic image that is applied to the sides of objects. Thanks to textures, we distinguish a sandy path from an asphalt one, a wooden box from a block of stone, a brick wall from a rock, etc. Of course, simply repainting an object, for example, with the texture of a car, will not make it drive, just as a regular brush painted with the texture of a door will not open - to do this, you need to turn the brush into an entity object and set properties for it.
Also, textures, oddly enough, affect penetration objects. In the folder "Cstrike\sound"there is such a file materials.txt, which lists the names of some standard textures and the material type assigned to them (wood, metal, rock, dirt, etc.). It was experimentally found that objects painted, for example, with a metal texture penetrate worse than objects with a wood or rock texture. However, if the texture name is not specified in materials.txt (and this is what happens when using non-original, custom textures), then the penetration of all objects on the map will be the same, regardless of the applied texture.
1.2 Where are textures stored?
All textures for Half-Life are stored in the folder Valve. Maps for CS use textures from folders Valve And Cstrike. To store textures in Half-Life, files with the extension *.WAD are used. One such WAD file can contain any number of textures from one to several thousand, and maybe millions (we haven't checked :)
1.3 How can you view textures?
To view textures you can use the program Wally (you can also create your own texture libraries in it, i.e. WAD files). Textures can also be viewed in the Hammer editor, in the built-in texture browser.
1.4 What are the standard texture files called?
The word "standard" refers to those textures that are located in the Half-Life and CS folder after installing these games. It's no secret that map creators often use their own (or taken from somewhere else) textures. So these textures are not standard.
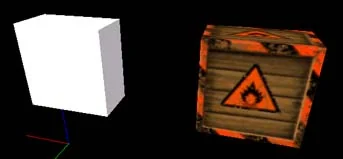
It turns out that the textures are from the folder Valve do not change and move from version to version. And here are the texture files for CS maps, which are in the folder Cstrike, may be removed or changed by developers. In principle, this is correct - if some official CS map was excluded from the list, then there is nothing to keep its textures for. Now imagine that your map used textures from this excluded WAD file...
After removing the WAD file from the standard game distribution, your card will not work. When the game does not find the WAD file that is used on the card, the card does not start and the game crashes with an error. And when some WAD file simply does not have the necessary textures, the map starts, but instead of the missing textures, black and purple squares are displayed. There is only one way out of this - include textures directly in the map (in the BSP file itself). But this is a topic for a separate article.
Below we provide a list of WAD files that are unlikely to ever be removed from the game and are therefore safe to use. You can use textures from these files and not include them in the map (in the BSP file). This will also slightly reduce the size of the map. After all, everyone has standard textures and it is unnecessary to transfer them along with the map.
- halflife.wad — the main WAD file of the Half-Life game with a huge number of textures (more than 40 MB)
- liquids.wad - water textures
- decals.wad - decals (see below)
- cstrike.wad - standard WAD file for CS
chateau.wad
cs_bdog.wad
cs_havana.wad
de_piranesi.wad
de_vegas.wad
itsitaly.wad
These are also standard texture files (since they are installed with the game), but there is no guarantee that at some point the maps, and along with them the textures, will not be removed from the CS distribution. That is why we recommend including textures from such WAD files as part of the BSP file of the map.
Remember, if you use textures from non-standard (your or any other) WAD files, then be sure to distribute them along with your map (in one archive). It's best to include textures from all custom files in the BSP map, but you can also create a separate WAD file.
Let's say you create a map and use textures from 10 non-standard texture files: 2 textures from the first, 2 from the second, 5 from the third, etc. So, for the map to start, all WAD files involved in creating the map will be needed. There is no point in distributing them all along with the map. We don't use all the textures from these files. So why increase the archive size? That is why it is necessary to create 1 WAD file and write down the textures used in it. And it's even easier and faster, we repeat, to include textures in the BSP file of the map.
1.5 Including textures in the BSP map file
Including textures in the map's BSP file means writing the textures directly into the map itself (without separate files). This eliminates the need to distribute separate WAD files along with the map.
Standard textures from the 4 WAD files listed above do not need to be included in the map. Everyone has these textures, and they are unlikely to ever be removed from the game. All other textures must be included in the map using special parameters during compilation. You can read more about how to do this in one of our next articles in this Chapter.
1.6 Texture sizes
The minimum texture size in Half-Life is 16x16 pixels. Less is not possible, more is possible. The maximum texture size typically used by mappers is - 512x512 pixels. We never saw more. We instruct you to check what will happen when using larger textures :) By the way, the length and width of the texture should be a multiple of 16, for example: 128x64, 256x192, 48x32, etc.
Usually, when applying texture, 1 texture pixel equate to 1 unit of object length. This is considered a normal scale, i.e. 1:1. For example, a texture with dimensions of 64x64 pixels should be applied to the side of an object with dimensions of 64x64 units or smaller (in this case, the texture is "adjusted" by the button Fit).
With a 1:1 blending scale, the textures look good. But if the texture is smaller than the size of the object, then in the game we will see some smearing, depending on the scale value. But sometimes, in order to save polygons, textures are specially applied with an increased scale of 2:1, 4:1, etc. You can read more about this in Chapter VI from the article about R_Speeds. There, this technique for dealing with "brakes" is described in some detail on the map.
If you pay attention to the sizes of textures in standard WAD files, then it becomes clear from them what size standard objects are: boxes, doors, walls. For example, very often there are textures of boxes with a size of 64x64 or 128x128 pixels, this indirectly indicates the sizes of standard boxes of 64x64x64 and 128x128x128 units. Of course, no one forbids using other sizes; it's just that boxes that are too small or too large (and any other objects in general) may seem unrealistic. The main thing here is to maintain the correct scale so that it doesn't turn out like on the maps from the series de_rats, although the idea is interesting :)
1.7 Texture scale
As we mentioned above, 1 texture pixel is equal to 1 unit of object length. This is a 1:1 texture mapping scale. If we apply a 128x128 pixel texture to a 64x64 unit box, then the scale will be 1:2 (or 0.5). If we stretch a small 32x32 pixel texture onto a 64x64 unit box, the scale will be increased 2:1.
The scale of textures is directly related to the number of polygons visible to the player when he moves around the map. The larger the texture scale, i.e. the more they are stretched, the fewer polygons the game engine processes, and the less the card slows down. In this regard, we recommend increasing the scale of textures in unimportant places (maybe mountains, ground, somewhere else).
Again, we recommend reading the article about R_Speeds from Chapter VI, it gives more specific recommendations for optimizing the map.
1.8 Texture names
Textures in Half-Life, namely in the main file of this game halflife.wad They are named for a reason. For example, the word "crate" or "crt" in the name of a texture means that the texture is for a box ("crate" in English is a box).
-
"crate" or "crt" - boxes
"water" or "wtr" - water
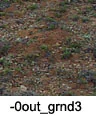
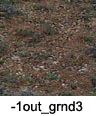
"ground" or "grnd" - earth
"fence" and "grate" - fences and gratings
"wall" - walls
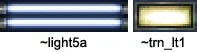
"light" or "lgt" - light bulbs or lanterns
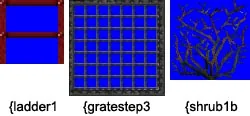
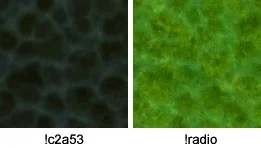
In addition to these words, there are certain prefixes (a set of 2-3 characters) that come immediately before the name of the texture, or rather make up the very first part of the name of the texture. These prefixes determine whether a texture belongs to a certain type. For example, a prefix in the form of an exclamation mark "!" means it is the texture of water; if at the beginning of the name there is a curly brace "{", then this is a partially transparent texture (i.e. a texture with a mask; used to create transparent fences, trees, etc.).
You can get the most detailed information about texture types from the next article in this Chapter.
2. Decals
Decals are special textures that can be applied on top of regular textures. Examples of decals are bullet marks on walls, traces of grenade explosions, traces of blood - in general, these are various types of traces. All decals are in the file decals.wad in the directory Valve.Unfortunately, you can only use standard decals on your maps. Unlike textures, decals cannot be included in the map and you cannot use your own decals, so you have to be content with the standard ones from the decals.wad file, although they are not so bad.


 This texture is located in the main texture library of the Half-Life game - halflife.wad
in the Valve folder. Used to create triggers and other brush entities that are invisible in the game. Examples of objects: trigger_once, trigger_multiple, trigger_hurt, trigger_push, env_bubbles, func_buyzone, func_bomb_target, func_ladder, etc. It is not recommended to use this texture for painting regular brushes, because this may cause an error.
This texture is located in the main texture library of the Half-Life game - halflife.wad
in the Valve folder. Used to create triggers and other brush entities that are invisible in the game. Examples of objects: trigger_once, trigger_multiple, trigger_hurt, trigger_push, env_bubbles, func_buyzone, func_bomb_target, func_ladder, etc. It is not recommended to use this texture for painting regular brushes, because this may cause an error. This texture is located in the main texture library of the Half-Life game - halflife.wad
in the Valve folder. Used to create the sky around the map. All sides of the brushes that make up the sky should be painted with the SKY texture. If there is a point object on the map
light_environment, this texture emits light. This creates general lighting on the map.
This texture is located in the main texture library of the Half-Life game - halflife.wad
in the Valve folder. Used to create the sky around the map. All sides of the brushes that make up the sky should be painted with the SKY texture. If there is a point object on the map
light_environment, this texture emits light. This creates general lighting on the map. This texture is located in the main texture library of the Half-Life game - halflife.wad
in the Valve folder. Used to create walls, floors, etc. that are invisible in the game, through which the player cannot pass (fall). In mapping, the expression "CLIP brush" is common. CLIP brush is a regular brush, but painted on all sides with a special CLIP texture.
This texture is located in the main texture library of the Half-Life game - halflife.wad
in the Valve folder. Used to create walls, floors, etc. that are invisible in the game, through which the player cannot pass (fall). In mapping, the expression "CLIP brush" is common. CLIP brush is a regular brush, but painted on all sides with a special CLIP texture. This texture is located in the main texture library of the Half-Life game - halflife.wad
in the Valve folder. Used to create an ORIGIN brush (a regular brush, but painted on all sides with a special ORIGIN texture). The ORIGIN brush, with its center, defines the point through which the axis of rotation of entity objects passes: revolving doors, fans, platforms, pendulums. Also, the ORIGIN brush sets the center for a train, car, or rotating platform. In general, if an entity object rotates or rotates in any way, then it must have an ORIGIN brush.
This texture is located in the main texture library of the Half-Life game - halflife.wad
in the Valve folder. Used to create an ORIGIN brush (a regular brush, but painted on all sides with a special ORIGIN texture). The ORIGIN brush, with its center, defines the point through which the axis of rotation of entity objects passes: revolving doors, fans, platforms, pendulums. Also, the ORIGIN brush sets the center for a train, car, or rotating platform. In general, if an entity object rotates or rotates in any way, then it must have an ORIGIN brush. You can make these textures yourself or find them in texture libraries zhlt.wad And
zeditor.wad
, which are included in the ZHLT utilities. Correct use of HINT/SKIP brushes helps reduce the slowdown on the map (i.e. increases fps).
You can make these textures yourself or find them in texture libraries zhlt.wad And
zeditor.wad
, which are included in the ZHLT utilities. Correct use of HINT/SKIP brushes helps reduce the slowdown on the map (i.e. increases fps). This texture is in the texture library zhlt.wad
, which is included with the enhanced ZHLT Custom Build utilities. NULL texture can ONLY be used with improved ZHLT utilities, that is, with ZHLT Custom Build. It doesn't work with simple ZHLTs. This texture can be applied to any objects (both brushes and entity objects). It is also allowed to combine this texture with other textures that allow this. By the way, you can successfully use the SKY texture instead of the NULL texture. The action is absolutely the same.
This texture is in the texture library zhlt.wad
, which is included with the enhanced ZHLT Custom Build utilities. NULL texture can ONLY be used with improved ZHLT utilities, that is, with ZHLT Custom Build. It doesn't work with simple ZHLTs. This texture can be applied to any objects (both brushes and entity objects). It is also allowed to combine this texture with other textures that allow this. By the way, you can successfully use the SKY texture instead of the NULL texture. The action is absolutely the same.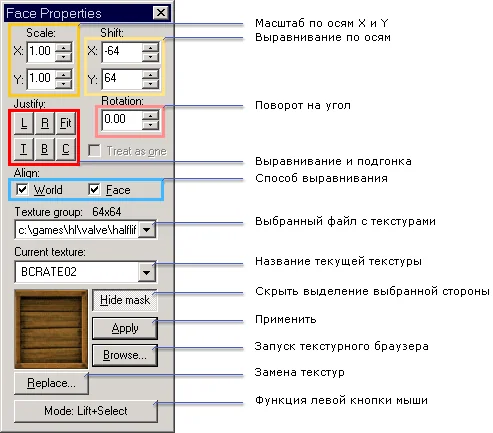 Scale (X/Y)
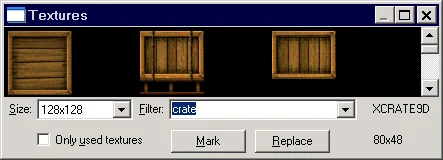 The window that appears displays all the textures connected to the Hammer. If in the texture work panel in the list Texture group
If you select one WAD file, then only textures from it will be visible in the browser. This makes it easier to find the right texture when there are a large number of connected files.
The window that appears displays all the textures connected to the Hammer. If in the texture work panel in the list Texture group
If you select one WAD file, then only textures from it will be visible in the browser. This makes it easier to find the right texture when there are a large number of connected files.
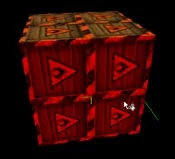
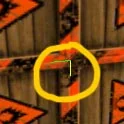
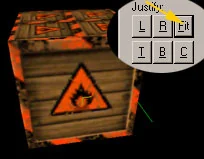
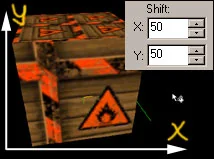
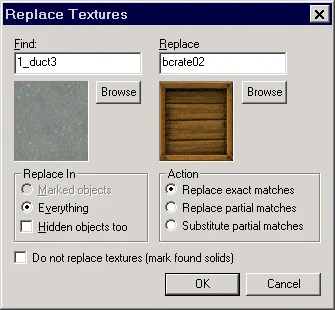 By checking the box Hidden objects too, You can replace textures on hidden objects as well.
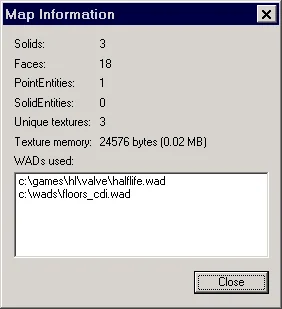 This window shows the number of different textures, the total amount of memory required for textures, as well as a list of WAD files that are used on the card (sometimes extra WAD files appear in the list).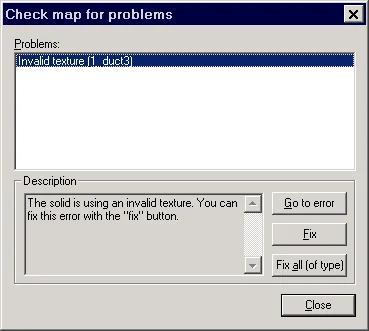
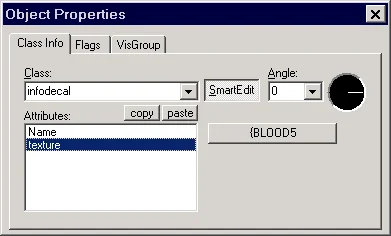 Name - decal name (no need to give it), texture
— the name of the texture from the decals.wad file; you can change it if necessary (just don't forget to select decals.wad in the list).
Name - decal name (no need to give it), texture
— the name of the texture from the decals.wad file; you can change it if necessary (just don't forget to select decals.wad in the list).
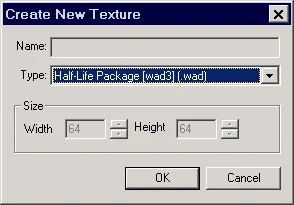 Copy the picture to the clipboard (for example, from ACDSee or IrfanView) and paste it into the newly created file: Paste (you can click Ctrl-E
). Save the WAD file under some name.
Copy the picture to the clipboard (for example, from ACDSee or IrfanView) and paste it into the newly created file: Paste (you can click Ctrl-E
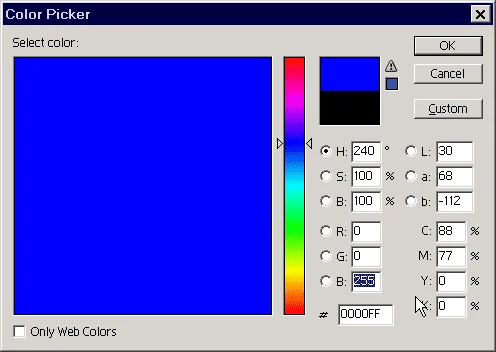
). Save the WAD file under some name.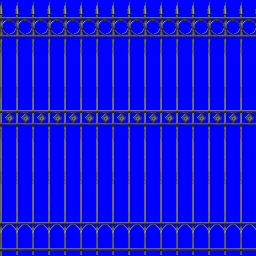 The main difficulties when creating textures with a mask arise from the shades of blue, which must be painted with pure blue (RGB: 0-0-255). We recommend painting in PhotoShop not with a brush, but with a pencil, because... it does not give shades of color. Look at the picture below:
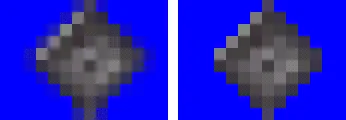 On the left is an example with more shades of blue. In the game, such a texture most likely will not be transparent. On the right is the correct version of the texture, in which all shades of blue are filled with pure blue (RGB: 0—0—255).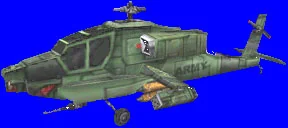
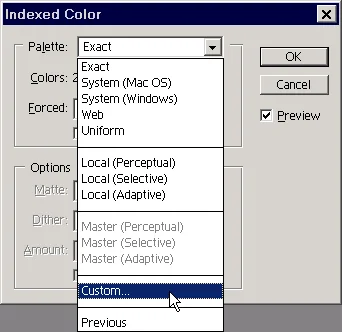
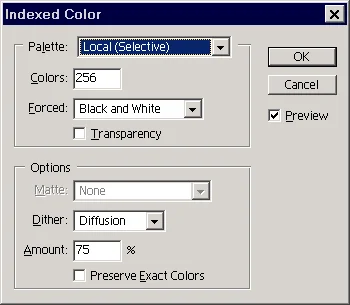
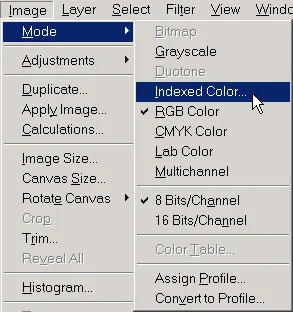 Select "Local (Selective)".
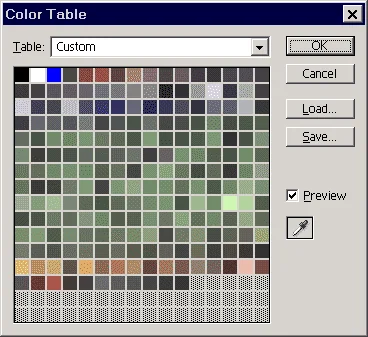
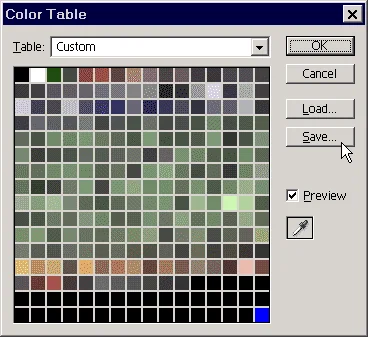
 Next, go to "Image\Mode\Color Table..." and look at what color we have blue under. It needs to go last - bottom right, if this is not the case - you need to change the palette.
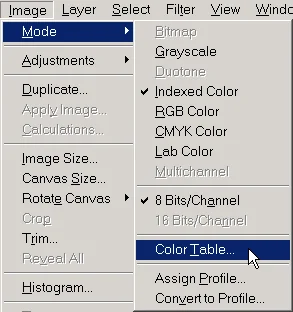 As you can see, we were a little unlucky, and the blue color is in the 3rd square. Such a picture will not be transparent, even if we set the correct display parameters for the entity object.